Bronze Poodle Sculpture

bronze dog sculpture

Tuesday, January 25, 2011

Poodle wax positives for lost wax bronze

This post shows the wax positives that were casted using the molds. The wax castings are hollow with walls ranging in thickness from 1/8" to 3/8". After the wax castings are re-detailed, they will be ready for the "ceramic shell" process.

lost wax process
Each section will be cast in bronze as is and welded back together to form the life size poodle. 

lost wax process

lost wax process
In this image you will note the jaw has been re-attached in order to avoid complex welding issues down the line.

lost wax process

Tuesday, January 4, 2011

Dog Matrix Mold Fabrication

dog sculpture mold fabrication
Cellophane is used to wrap the entire sculpture. This will temporarily protect the dog sculpture from having the water-based clay adhere to my Chavant clay (Chavant NSP hard was used to sculpt the poodle). The water-based clay mass will later be replace by the silicone.


dog sculpture mold fabrication
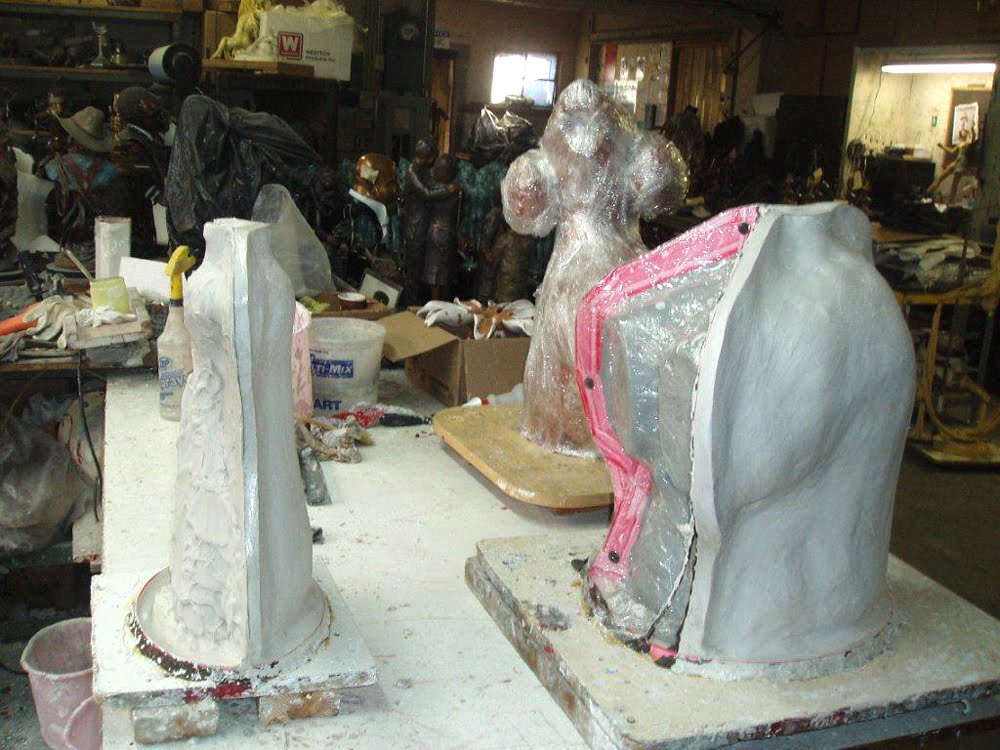
Here you can see where one of the seams with keys is located.  A wall of clay is used to cover the entire area where the silicone will eventually go. The wall of clay is somewhat uniformed in thickness.  


dog sculpture mold fabrication
Plaster and hemp are applied over the wall of clay. This section is referred to as the “mother mold”. The mother mold will house the silicone mold and help line up all the keys.  


dog sculpture mold fabrication
Here are two completed (limb) molds.


dog sculpture mold fabrication

dog sculpture mold fabrication
This image depicts the mother mold after the cellophane and water-based clay have been removed.  The other half of the mold will be used to enclose the leg. The seams will also be temporally sealed in order to prevent the silicone from escaping. The silicone will be poured from the highest point of the mother mold.


dog sculpture mold fabrication
This image taken minutes after removing one half of the mold. The blue material is the silicone. The silicone is used to capture all the detail from the original sculpture.  The next step is to remove the original clay sculpture from the silicone.

Wax is then poured into the mold in order to produce the wax-positives.  More on this later….


The American Fine Arts Foundry is the Bronze Casting Foundry I am utilizing for this bronze dog composition. The foundry is located in Burbank, California.

click on the logo to visit their site.

bronze casting foundry

Preparing clay dog sculpture for the mold fabrication

This section show how large sculptures are broken down into smaller manageable sections. After the sections have been casted in bronze, they will be welded back together. The original clay sculpture will be reassemble in order to aid the welder.

dog sculpture mold fabrication

dog sculpture mold fabrication
The tail has been removed

dog sculpture mold fabrication

dog sculpture mold fabrication

dog sculpture mold fabrication
This image show how a section of the jaw has been removed. The torso and legs have also been severed.

dog sculpture mold fabrication
This is the rear section of the poodles torso. Red wax is used to seal the foam. Without using wax to seal the foam, the silicone will adhere to the foam and create problems when de-molding.

dog sculpture mold fabrication
The limbs and jaw ready for mold fabrication.

Monday, November 29, 2010

Completed Poodle clay sculpture is now ready for the mold process

The clay poodle dog sculpture is now completed. The client will now review the images and make last minute requests for any modifications. Once the poodle sculpture is approved, I will give the entire sculpture a wash with a solvent in order to minimize any tool marks and shavings that may still be visible on the surface. The process will take 2-3 days to allow the solvent to dissolve and ensure the clay returns to its natural hardness.

The solvent is used to slightly soften the clay in order to aid in the blending.

Applying a wash at this stage helps with the surface detail in order to give it a more realistic look and feel. By not cleaning the dog sculpture surface before the mold fabrication will create additional work for me during the wax-positive stage.

Molds capture every detail; therefore, it is wise to only fabricate a mold after everyone is happy with the final clay sculpt.

A wax-positive is an identical replica of this clay sculpture; the only difference is that it is a wax casting from the mold. Wax-positives for most bronze castings are hollow. The walls of the wax cast vary from 1/8” to 5/8” in thickness.

More on the process once the images are available.


final clay poodle sculpture View of the under side of Trackers head.

final clay poodle sculpture Front view...

final clay poodle sculpture Profile of the entire dog sculpt.

final clay poodle sculpture The paw area showing the poodles nails. Let me know if you wish to have the toenails shorten.

final clay poodle sculpture Tracker (poodle) front leg.

final clay poodle sculpture Detailed image of the fur texture.

final clay poodle sculpture Another view of the fur texture.

click on any of the images for a better better view

Saturday, November 20, 2010

Final details are added to fur texture

Adding the final detail to the poodle’s fur texture. After building up the clay layers for the fur texture I am now using a fine ballpoint tool to create the hairlines. The clay is very hard; therefore, I am only able to work 3-5 hours a day before my hands cramps. It looks like I may miss my target date of Tuesday as the completion date. I will not cut corners; therefore, I anticipate it will only take an additional 2-3 days.

3-4 layers of clay, Final detail is applied to clay poodle
The head, neck, chest areas are completed. Tracker's right side still need to under go the final detail.

3-4 layers of clay, Final detail is applied to clay poodle
Here you can see a detailed view of the ear and head area. A final wash will remove the minute clay shavings. Mineral sprites will be used for the wash.

3-4 layers of clay, Final detail is applied to clay poodle
Here is another view of Tracker's right side that still needs the hairlines applied to the fur clusters.

3-4 layers of clay, Final detail is applied to clay poodle
David, do you wish to have the tip of the jaw narrowed a bit more. I narrowed it once, but I am not sure if it needs to be narrower.

Tuesday, November 2, 2010

Fur texture for Tracker the poodle

The images on this post show what Tracker looks like after his second coat of clay. I will apply one more coat of clay to finalize the fur texture.

clay poodle styrofoam is coated with modeling clayFor a better view of the texture, click on the image...

clay poodle styrofoam is coated with modeling clayHere is tracker standing on my kitchen table...

clay poodle styrofoam is coated with modeling clayI do not remember if Tracker is neutered, for now I made him a full male.

clay poodle styrofoam is coated with modeling clayRight side profile.
clay poodle styrofoam is coated with modeling clay
Left side profile.

Tuesday, October 26, 2010

First layer of clay for the dog armature

Tracker (poodle) gets his first coat of clay. Two to three layers will follow in order to capture the poodle's fur texture.

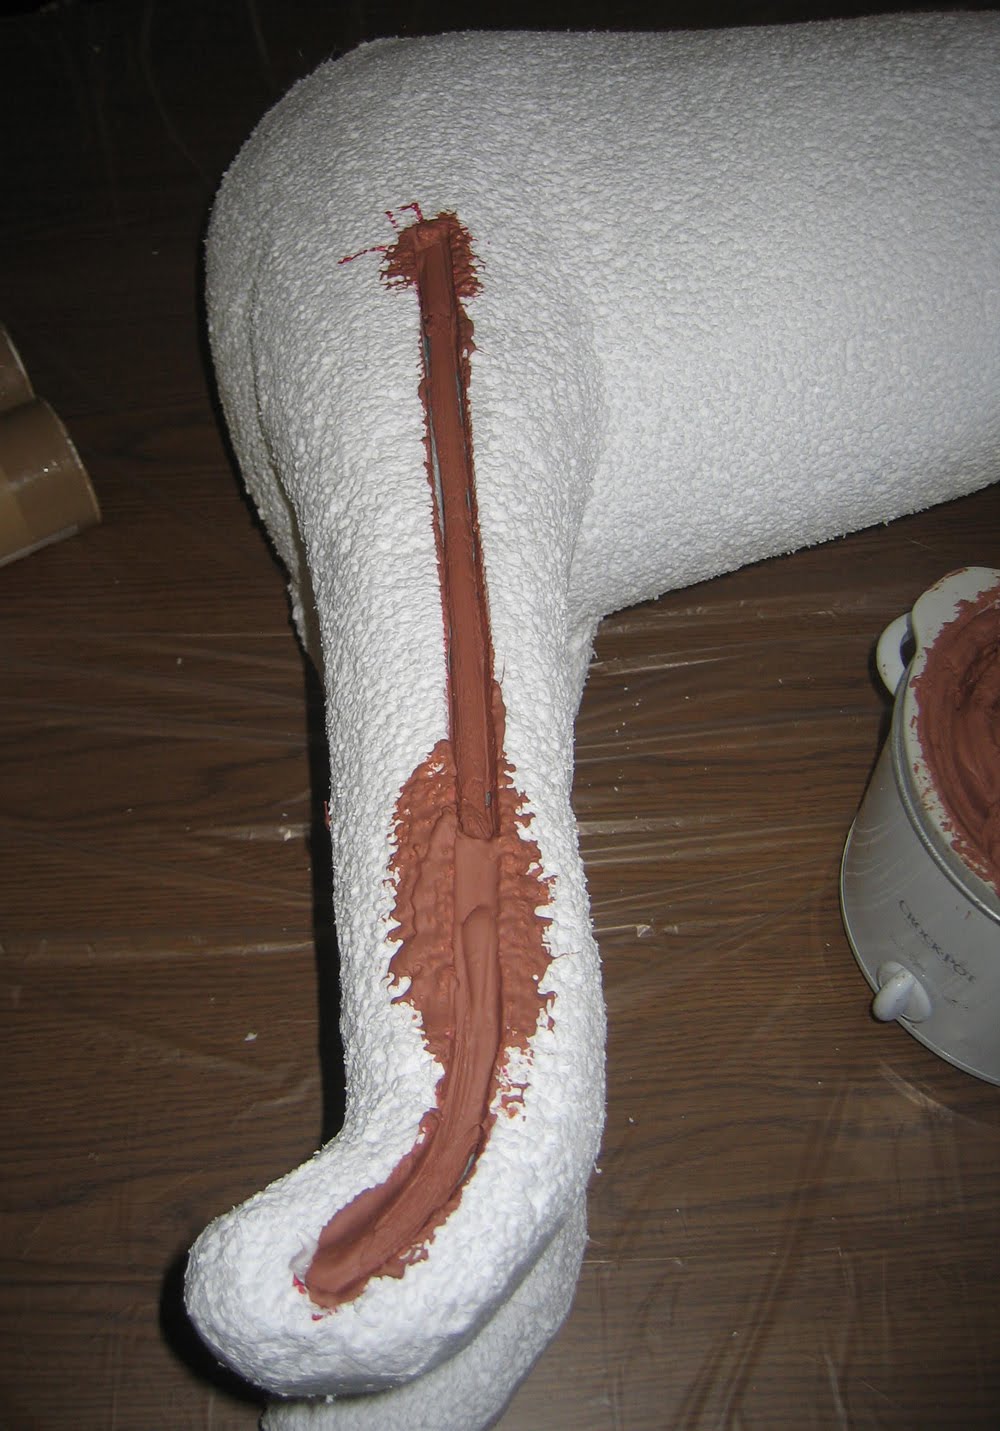
The first image shows where the rods became embedded into the legs. Molted clay was allowed to saturate the groove and rod area.

clay poodle Aluminum rods and styrofoam are coated with modeling clayI used a crock pot to melt my bricks of NSP hard Chavant modeling clay. The clay was applied using a brush and spatula.

clay poodle Aluminum rods and styrofoam are coated with modeling clayHere you can see where I reattached the head to the body. A 3/4" x 12" pipe was used to join the two sections. Clay was then brushed on to fuse the sections.

clay poodle Aluminum rods and styrofoam are coated with modeling clayThe additional layers of clay will fill in the areas that do not look quite right. For instance the rib and neck sections.

clay poodle Aluminum rods and styrofoam are coated with modeling clay
The ears and jaw areas will also be revisited.

Live sculpting broadcast by HandsofCaesar.com

The top screen is used when I am broadcasting live from www.ustream.tv/channel/tutorial%3A-how-to-sculpt-in-clay---artistsculptor

When I am not broadcasting a list of current short movie clips are played.

I will try my best to embed the short videos recorded from the live broadcast on this blog.


Dog, Wildlife, Action Figure; Fantasy sculptor
click here or on the image to see me live on
my ustream.tv channel... 12:00 - 6:00 PM PST